This post contains sponsored content, but the opinions are my very own.
Hi there, how are you doing today?
Being a digital influencer, fixing my smile was a top priority. I don’t drink coffee or soda, but my teeth are naturally very yellowish. I was always somewhat embarrassed about smiling in public.
I am excited to share some news with you guys! I just had my teeth whitened this last week and I am so happy and satisfied with the results.
As my Grandma used to say, the smile is the window of the soul. I couldn’t agree more with her quote. Every time I meet somebody new, the first thing I notice is their smile.
I was sent this teeth whitening kit in exchange to my honest review about it.
When I accepted the challenge to do this DIY teeth whitening, I wasn’t very confident about the results. In the past, I had tried many products like pastes and gels, but I could never notice any difference in the tone of my teeth. I was literally wasting my money and time.
So, I tried Smile Brilliant for the first time and I am extremely happy with the results.
Before and After


With only 4 applications in a week I could finally see progress in the whitening process. IT TOTALLY WORKS YOU GUYS!!!
The Smile Brilliant package comes to you in a cute, fancy box and it contains the Tray Creation Kit that Includes:
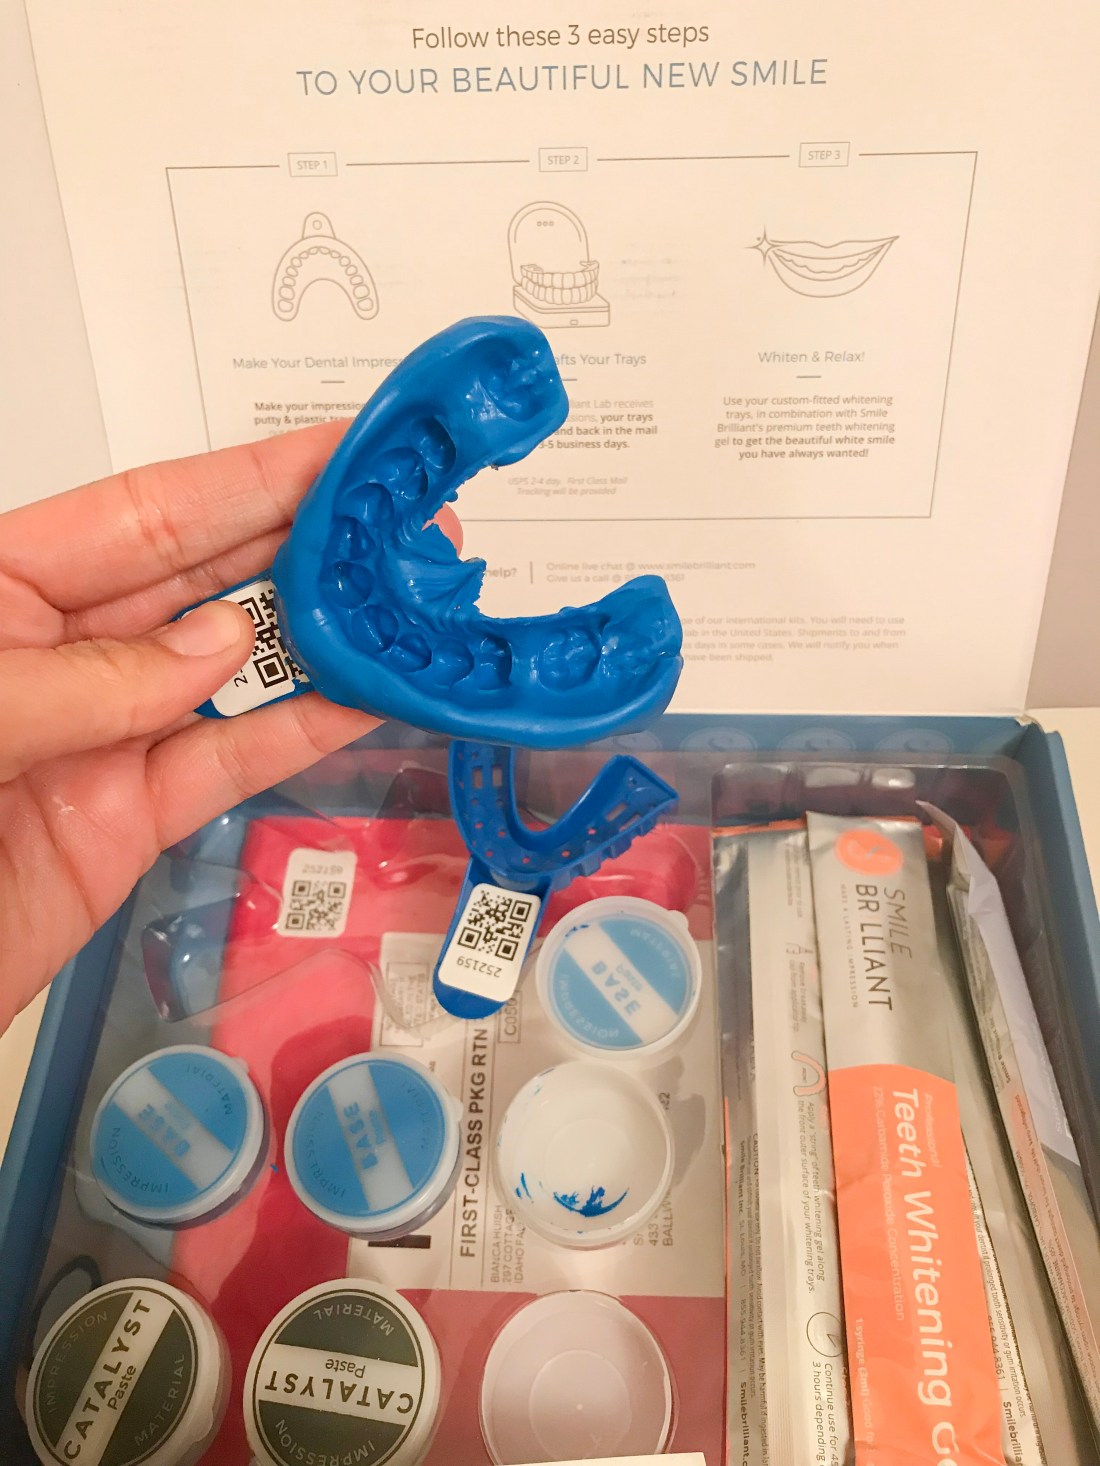
· 3 Catalyst pastes
· 3 Base Pastes
· 2 Impression trays
· 3 desensitizing gel
· 3 whitening gel
· Instruction guides
· Return card and Postage – Paid envelope.
The process is easy! *Make sure to read the instruction guide before you start whitening your teeth*
You mix the catalyst and base paste together until they are homogeny (you must work fast, or the paste will dry out before you can finish it). Put the paste in the tray, bite on it for a few minutes and that’s it, you just created your first mold impression. Repeat the same steps so you will have two sets of trays. One for the upper teeth and the other for the lower teeth.
Then, send back the trays with the return card in the paid envelope and wait a couple of days. This is really fast, I got mine back after 4 days.
Once you get your mold back you can start the whitening process.

Like I mentioned before, I have used the kit 4 times and I am obsessed with the results already!
Let me be honest with you, what I really love about Smile Brilliant is that they are cruelty free and vegan so you can use it with your conscience free that you are not causing any pain nor supporting a business that support tests in animals. This is super cool.

GIVEAWAY!!
If you would like to have a chance to try your own kit, I am excited to announce that I have partnered with Smile Brilliant to host a giveaway on my Instagram. One lucky winner will receive $149 credit for a t-3 sensitive system. To enter the giveaway, click HERE.
Thanks for Checking in,
Xoxo
-Bianca
How Much Is Teeth Whitening
//www.smilebrilliant.com/widget-article/mommahuish
