Sweet Nora’s Ice Cream Party

image2

Hi there, how are you doing today?

As I promised, here are the pictures of Nora’s Ice Cream birthday party. Every single detail was homemade with so much love. I hope you enjoy!


Isn’t the cake the cutest? What if I tell you that my sister-in-law and I made this cake in less than three hours start-finish, would you believe it?

Processed with VSCO with c1 preset


My very talented sister-in-law made these adorable cake pops. They were delicious btw!


Processed with VSCO with c1 preset

I seriously can’t believe she is really ONE.


Thanks for checking in!

xoxo

-Bianca


Advertisement

DIY Easy Teeth Whitening

This post contains sponsored content, but the opinions are my very own.

Hi there, how are you doing today?

Being a digital influencer, fixing my smile was a top priority. I don’t drink coffee or soda, but my teeth are naturally very yellowish. I was always somewhat embarrassed about smiling in public.

I am excited to share some news with you guys! I just had my teeth whitened this last week and I am so happy and satisfied with the results.

As my Grandma used to say, the smile is the window of the soul. I couldn’t agree more with her quote. Every time I meet somebody new, the first thing I notice is their smile.

I was sent this teeth whitening kit in exchange to my honest review about it.

When I accepted the challenge to do this DIY teeth whitening, I wasn’t very confident about the results. In the past, I had tried many products like pastes and gels, but I could never notice any difference in the tone of my teeth. I was literally wasting my money and time.

So, I tried Smile Brilliant for the first time and I am extremely happy with the results.

Before and After


With only 4 applications in a week I could finally see progress in the whitening process. IT TOTALLY WORKS YOU GUYS!!!

The Smile Brilliant package comes to you in a cute, fancy box and it contains the Tray Creation Kit that Includes:

image3 (3)


·         3 Catalyst pastes

·         3 Base Pastes

·         2 Impression trays

·         3 desensitizing gel

·         3 whitening gel

·         Instruction guides

·         Return card and Postage – Paid envelope.

The process is easy! *Make sure to read the instruction guide before you start whitening your teeth*

You mix the catalyst and base paste together until they are homogeny (you must work fast, or the paste will dry out before you can finish it). Put the paste in the tray, bite on it for a few minutes and that’s it, you just created your first mold impression. Repeat the same steps so you will have two sets of trays. One for the upper teeth and the other for the lower teeth.

Then, send back the trays with the return card in the paid envelope and wait a couple of days.  This is really fast, I got mine back after 4 days.

Once you get your mold back you can start the whitening process.

IMG_2520


Like I mentioned before, I have used the kit 4 times and I am obsessed with the results already!

Let me be honest with you, what I really love about Smile Brilliant is that they are cruelty free and vegan so you can use it with your conscience free that you are not causing any pain nor supporting a business that support tests in animals. This is super cool.


IMG_2534-2

GIVEAWAY!!

If you would like to have a chance to try your own kit, I am excited to announce that I have partnered with Smile Brilliant to host a giveaway on my Instagram. One lucky winner will receive $149 credit for a t-3 sensitive system. To enter the giveaway, click HERE.


Thanks for Checking in,

Xoxo

-Bianca


How Much Is Teeth Whitening
//www.smilebrilliant.com/widget-article/mommahuish

Valentine’s Day

Hi there, how are you doing today?

We are a few days away from Valentine’s day. It is my favorite holiday because everything is just so pretty and romantic.  I look forward to it every year!

Today we had a mini Valentine’s day celebration with the girls and I want to share it with you.

First off, table decorations.  If you are on a small budget like us, this is the perfect décor for you.

Processed with VSCO with a10 preset

Processed with VSCO with a10 preset

 I wanted to keep it simple but also cute, so I decided to use a white table cloth. I really like white because you can’t go wrong with it. Since we have two girly girls I added a lot of shades of pink, but If I had boys, I would just switch the shades of pink for more red and gray and it would work amazing as well.

Processed with VSCO with a10 preset

You see that cute pink table runner? It is cheap wrapping paper from the dollar store. I cut it to look like a table runner (When you are done with it, just throw it in the trash. so easy!).

Processed with VSCO with c3 preset

 The flowers are from SAMS club (The quality of their flowers are amazing, they also last forever) $9

Heart shaped Confetti is from Target $1

Pink wrapping paper/table runner is from Dollar tree $1

Red napkins (leftover from Christmas) from Dollar tree as well $1

 Processed with VSCO with a10 preset

Isabel and I also baked the cookies pictured. They are delicious and super easy! You can find the full recipe HERE.  They are sugar cookies with a regular white and pink-dyed frosting.

We also did a mini Valentine’s day session and it was lots of fun. I am seriously dying with these little cupids of mine!  I was trying to convince Gregory, my husband to participate and try on the wings, but he refused.  These girls are my cuties and I love them so much!  They are my mini Valentines.

Processed with VSCO with a10 preset

Processed with VSCO with a10 preset

 Processed with VSCO with a10 preset

Happy Valentine’s day! And thanks for checking in.


Xoxo

-Bianca


Nora’s Birth Story

Hi, how are you guys doing today? This week is crazy over here. I have a huge pile of dishes that I need to wash and clothes all over the place to fold. At least the girls went to bed by 8:00 PM tonight which is a super mom win for this very tired mama over here. But instead of doing the dishes as I mentioned, I am right here laying on my bed, under my blankets writing Nora’s birth story. (I know, she is almost 9 months, but seriously trust me, life with two is crazy.)

This is me, writing for my Nora. I hope you enjoy it!

 Processed with VSCO with a4 preset

Dear Nora,

I am writing this in hope that you will read it in the future and show it to all my cute grandkids. I hope you keep this close to your heart as I keep it to mine, my beautiful and loved daughter. It’s so crazy to think back and remember all the details about how you came to this earth, to this family, to us. You are just the perfect fit and we couldn’t have asked for a better soul to fill out our family as yours.

Your birth story starts on May 12th sometime between 3:00-3:30 a.m. just one day before your due date. Here we go.

 I woke up with a cramp that was painful, but I could take it. I thought I would just go back to sleep and try to relax but nope, another cramp came in. They were close to each other. I grabbed my phone that was sitting at the nightstand to start timing the contractions.

They were consistent, coming in every 4 minutes. Then after a couple more minutes, they jumped to only 3 mins apart, that moment I knew the time was coming and I needed to go to the hospital ASAP.

At that time, we lived in a small college community and thank goodness, the hospital was only 5 mins away. We got dressed (I totally considered going to the hospital in pajamas but somehow, I was able to between contractions, get dressed). So, we loaded the car with our suitcases and hurried to the hospital in the middle of the night. The 5-minute drive turned out to be only 3 minutes, but I can tell you that they were the LONGEST 3 minutes of my life.

We got to the hospital. We couldn’t find parking. I didn’t want to walk by myself, so I stayed in the car with daddy driving around the parking lot until we could find a spot. That wasn’t a biggie, except that we parked kind of far away from the entrance and I had to walk a distance in labor (Also, longest walk of my life).

We made it to labor and delivery. It wasn’t too busy that early morning. A nurse came in and took me to a room where she was going to make sure I was in “real” labor (like they couldn’t tell by all the screaming and crying I was doing) while daddy went to the front desk to do the paper work.

Another nurse came into the room, she put a little machine on my belly to check on the contractions. They were getting so close to each other. Daddy gets back in the room and the nurses left. I was in so much pain. At that point, the contractions were so close almost like they weren’t stopping. I was so scared!

Your daddy told me he needed to use the bathroom (When he gets nervous, he needs to… you know, #2) and I was left alone in the room. I am not going to lie, I got so upset and frustrated with your Dada. Seriously, I was in so much pain, attached to a bed, not being able to move and so alone! I prayed, prayed to my Father in Heaven to let me do that, to give me the strength I needed and also to never let me get pregnant EVER AGAIN. HAHA. So silly, I know!

A couple minutes later, Daddy was back and so too were the nurses. They moved me to the room you were born at. The room was huge, I remember that. They laid me down again in bed and one of the nurses checked me for dilatation. She said I was at 6. I couldn’t believe it because I was in so much pain.

I cried and cried non-stop asking for mercy and someone to take that pain away. I was miserable! I started begging for some kind of anesthesia, it was like a show where I was the one screaming and screaming until one of the nurses said that the anesthetist wasn’t available at that moment. My world fell down. I just wanted that pain away and you in my arms.  

This all happen in one to two hours. And FINALLY the anesthetist came in, I was close to 7 of dilatation. I got an epidural and I was back to life (seriously, epidural is life). I was happy and very anxious then Daddy had to leave the room again because he was so nervous he needed to eat or he would pass out right there in the room.

Well, I let him go get himself some food not expecting that he would stay close to one hour in the hospital’s café.  It was 9:10 AM, I was at 9 cm. Your daddy came back to the room, gave me a kiss as time was getting so close to meet you. I wish I had wrote this as soon as you were born so I would remember more details. Even missing some small details, I’m grateful for all that I do remember of that beautiful day.

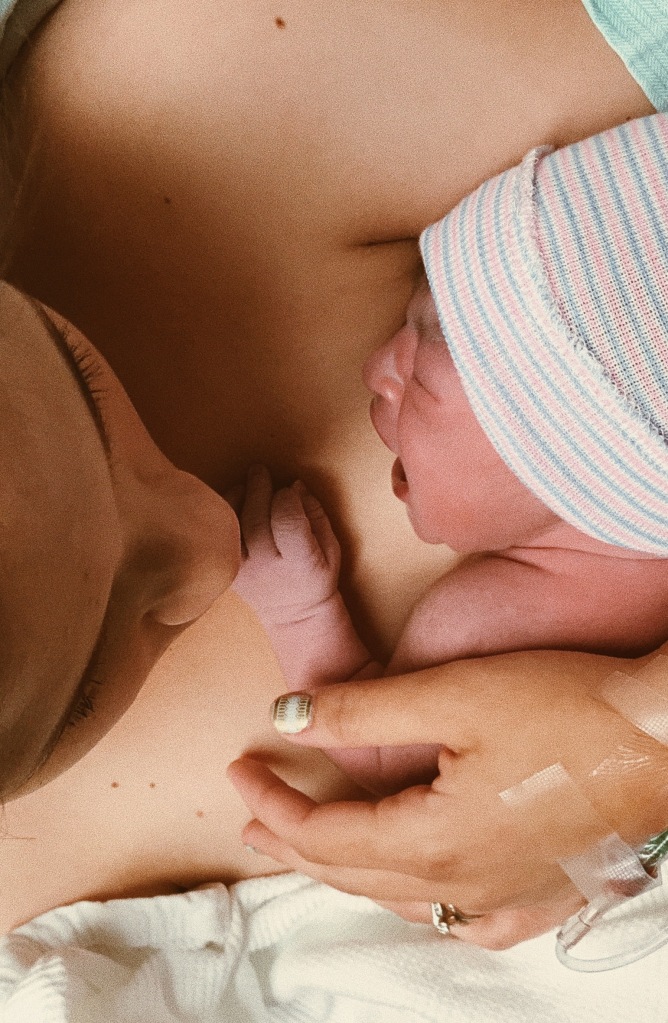
10:00 AM, the doctor came in. He checked me and said I was ready to push. I pushed 3 or 4 times and you were here. It was so fast. You were born May 12th at 10:21 AM, on a magical Friday morning.

Processed with VSCO with a4 preset


Processed with VSCO with a4 preset


Processed with VSCO with a4 preset

You came straight to my arms and we stared at each other for a long time. You fit in just right, and that moment I knew you were everything I wanted and needed. That moment I realized, you were the love my savior has for me, you were his light and I felt so connected to heaven at that moment. You were that tiny little perfect baby girl, so perfect to this little family of ours.

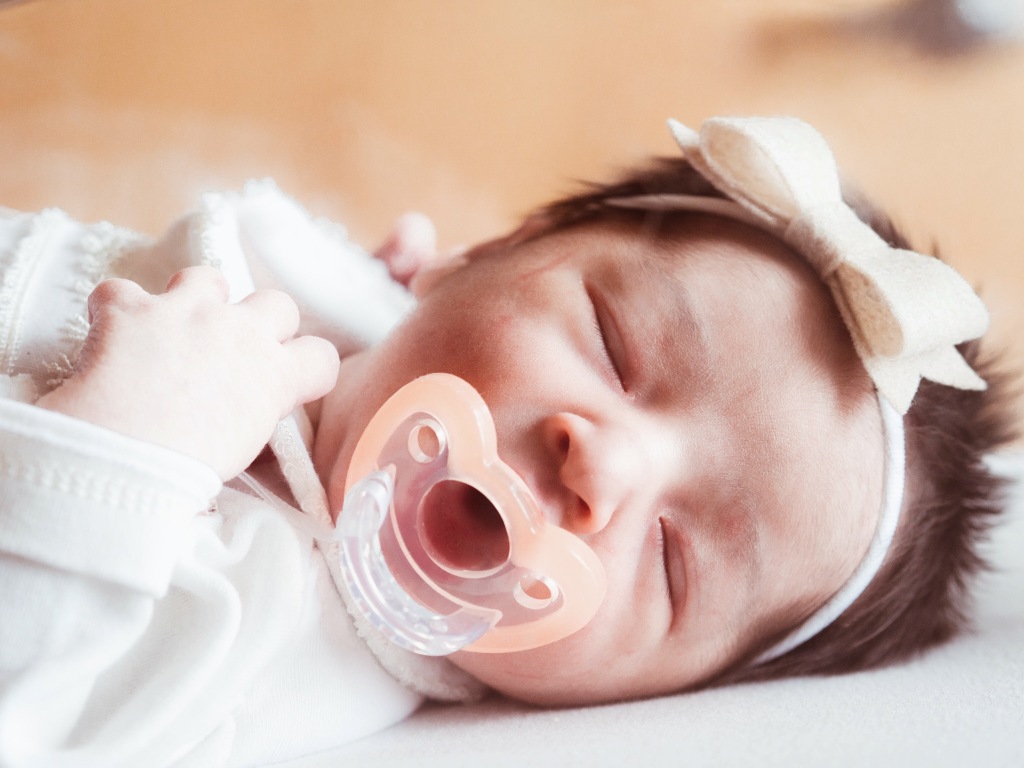
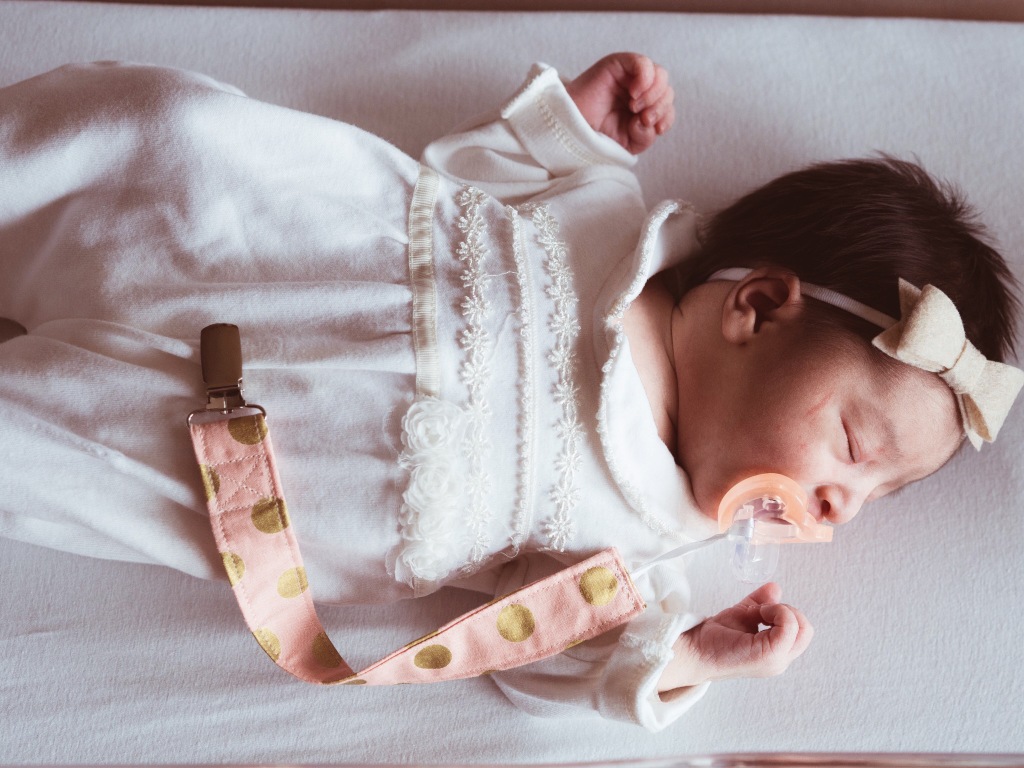
Welcome to the world my NORA HELENA HUISH

Processed with VSCO with a4 preset


Processed with VSCO with a4 preset

📷: @ana.huish


Thanks for checking in.

Xoxo

-Bianca.

The Very Best Pizza Dough Recipe Ever

Processed with VSCO with a4 preset

Hi there,

How are you doing today?

This week I want to share with you the very best pizza dough recipe ever that we make at least once a week in our home. I learned this recipe from my mother’s in-house assistant back when I was 12 years old. I have made this pizza dough recipe many times and each time I make it, I get many compliments about how tastes, and fresh and soft the pizza is.  

Processed with VSCO with a4 preset

Processed with VSCO with a4 preset

To reach out the perfect dough I had to do some adjustments as this recipe was created in Brazil with local ingredients.  (Recipe Below)

Ingredients:

42 g active dry yeast (2 packages)

3 Tbsp. Sugar

1 Cup warm water (warm, not super-hot or you will kill the yeast)

6 Tbsp. Olive oil

3 Tsps. Salt

2 ½ – 3 Cups All-purpose flour


Instructions:

In a large bowl mix the yeast, sugar, and warm water. Mix it with a spoon, then cover with a clean cloth and let it rest for 3 mins.

Add the olive oil and salt. Mix it up. Then add the flour, a cup at a time until the dough is not sticky. Then cover it and let rest in a bowl for 30 mins and that’s it. The dough is ready.

Split the dough in half and roll each ball until very thin and place it in a greased pan.

Now would be a good time to preheat oven to 375⁰ Fahrenheit

Now comes my favorite part, top your pizza dough however you would like.

Bake at 375⁰ F for 15-20 mins you might want to check it after 12 mins just to see how close it is to finishing.  Depending on how thick/thin the dough was rolled it may finish quicker or take the full time.

Enjoy!

Processed with VSCO with a4 preset


My family loves this recipe. We like doing some brazilian style toppings like Ham, Corn (HAHA), boiled eggs and some veggies.  In my husband’s words, this pizza dough is one of the reasons he married me 😛  What is your favorite pizza topping? I would love to know!

If you try this recipe, snap a photo and hashtag: #mommahuish #mommahuishblog #mommahuishpizzadough


Thanks for checking in.

Xoxo

-Bianca


Saranghae REVIEW

This post contains advertising content, but opinions are my very own.

IMG_0565

Hi, how are you doing today?

This last week I took a little break from Social Media to fully enjoy the beginning of the year with my little family. Now, I am ready for 2018 and for lots of work on the blog.

Growing up, people would always tell me that my skin was perfect. (HAHA) Not that I want to show off, I honestly can’t remember the last time I had acne or anything, really. Now I am almost 25 and mom to two little girly girls (I know I am not that old). I feel like it is time to give my skin some well deserved love and care. Did you know that the earlier you start preventing aging of the skin the better the results?

IMG_0538 (2)

IMG_0626

A couple of weeks ago I received some awesome products from Saranghae (An innovative and award winning 5 step Korean anti-aging skin care routine). I have been using their products for two weeks now, and if you know me you know I wouldn’t share a product with you if I did not use it and like it. It is safe to say that I love Saranghae products because with only two weeks of use, I have already noticed some difference in tightening my skin. My face feels firmer, specially under my eyes and my forehead as well. Their products have amazing smell, surprisingly different from many other anti-aging products that usually have a strong smell.

IMG_0550

Three things that are extremely important to me when it comes to skin products are: healing, regenerating, and protecting. You can have spa-like results at home with Saranghae products in your daily routine in 5 easy steps:

Step 1. Saranghae Nourishing & Moisturizing Oil + Foam Cleanser with Truffle Extract & Gold (Click here to read more about step 1)

Step 2. Saranghae Deep Radiance Essence + Serum (Click here to learn more about step 2)

Step 3. Saranghae Firm and Lift Cellular Regeneration Cream (Click here to learn more about step 3)

Step 4. Saranghae Focus Renewal Eye Cream (Click here to learn more about step 4)

Step 5. Saranghae Elemental Essence Mask (Click here to learn more about step 5)

IMG_0629

IMG_0632

Saranghae products are unique. They are not only preventing the age of my skin but healing it as well.

Valentines day is coming up and if you wanna look amazing for your valentine, I recommend using Saranghae 5 step anti-aging skin care routine.


Thanks for checking in.

xoxo

-Bianca Huish


New Years

Hi there,

How are you guys doing today?

We are only 4 days away from 2018 and I absolutely love New Year’s Eve. As a good Brazilian, we pretty much party hard any holiday, especially the New Year.

This year, we can’t be with family to celebrate the beginning of 2018, so we are staying at home but the Brazilian in me couldn’t let this holiday pass by unnoticed. So, we are doing a small but fun party at home for our little family. (HAHAHA This makes me laugh because the girls will be in bed by 8 PM and it will be just Greg and I up)

Processed with VSCO with a4 preset

Since it is going to be a small celebration just for us, I did a table décor a little more casual but still sophisticated. Everything pictured in this table décor including the table cloth, champagne glasses, candles and other items you can find easily and for cheap at Walmart. Here is some inspiration for your décor on a budget just in time for the Holiday.

Processed with VSCO with a4 preset

Processed with VSCO with a4 preset

 One of the things we do each year on December 31th is dress up in white clothes. Brazilians are very symbolic and the reason we dress up in white is to wish for peace in the new year coming. I love this tradition so much, it is something Greg and I want to do for every new year.

Processed with VSCO with a4 preset

I hope 2018 will be a great year for all of us, full of love, peace and health.

Happy New Year!!!

Thanks for checking in.


Xoxo

-Bianca

REVIEW Planet Box Rover Lunch Kit

IMG_9983

This post contains advertising content, but opinions are my very own.


Hi there, how are you guys doing this week? I cannot believe Christmas is only 3 days away. With that said, we are only a few more days away from the New Year.

2018 is going to be a big year for us. Isabel is going to start pre-school. Having her away from home for a couple of hours gives me all the feels. Am I prepared for that? Is she going to be okay? Is she going to eat good?

To make sure Isabel will be eating good, I decided to look for a good quality snack/lunchbox. I soon found Planetbox. (Call me a hippie if you want,) I love taking good care of my children’s health and toxin free products are something I am always looking for. Planetbox  products are amazing because they are non-toxic, non-leaching, safe from BPA, phthalates, and lead. They also come in three different styles (Shuttle, Rover, and Launch).

IMG_9975

We got the Rover lunch box because it is the perfect size for kids, it is divided in small portions, versatile and has two little containers that I love because it means less plastic bags, paper or any type of trash that hurts my heart and conscience.

One of the things that make Planetbox my favorite is because their products are stainless and dishwasher safe. So, after a busy day, I can just put the whole metal lunch box in the dishwasher and not worry about a thing (big plus).  I find it very stylish as well. I absolutely love the metal look. It is so modern.

IMG_9989

Here is an idea of how I pack Isabel’s lunch:

*If you have a picky toddler like me, you have to be creative, in this lunch box I packed pretty much everything she loves*

Gold fish crackers

Cheddar cheese in cubes

Some fruit (Mango, grapes, orange and/or berries)

Strawberry Yogurt

IMG_9995

I am impressed with our Rover lunchbox and I would totally recommend it if you have preschoolers like me or have kids in general. Although Isa isn’t in school yet, it’s been great for road trips, adventures to the park, and for play date snacks.  Even Gregory (my husband) wants a Planetbox of his own.

What do you pack your kid’s lunch?


Thanks for checking in.

          Bianca

xoxo

The Huishes New Christmas Tradition

Hey there, how are you guys doing?

I cannot believe Christmas is only 14 days away! Isn’t that so wonderful? I adore this time of the year so much. I love the music, the food, the spirit, the decor and pretty much everything related to Christmas. But what I like most about this season is adding traditions to our family.

As some of you might know we added a new member to our family this yea. I am so excited to celebrate our first Christmas as a family of four. I really hope it goes just as good as it sounds! HAHA.

Voilà! A new Huish family tradition was born!!!

IMG_9808

Throughout this year Greg and I have been thinking about cookies a lot. Why not, right? I mean who doesn’t love cookies? Said no one else ever.

So, let me tell you a bit more about this year’s new tradition. Every Sunday of December we bake cookies to gift to our families and friends. It is fun activity for the little ones and it is also a great opportunity to spend quality time with each other. Isabel loves being involved in the kitchen, and even Nora was there with us while we talked, played, listened to Christmas songs and baked the cookies.

IMG_9825

Because the cookies turned out so delicious, here is the recipe so you can try it and tell me what you think 😊


Easy Sugar Cookies Recipe

INGREDIENTS:

½ Cup of Salted butter (Room temperature)

¾ Cup Granulated white sugar

1 Egg

1 Tsp Vanilla Extract

½ Tsp Baking Powder

2 Cups of All-Purposed Flour


INSTRUCTIONS:

Preheat oven to 375 degrees.

Begin with placing the butter in a bowl with sugar and beat until smooth.

Add egg and mix well.

Add the vanilla and baking powder.

Then add the flour one cup at a time and mix until the ingredients are combined.

*this recipe required the dough to chill in the freezer* but because I am Brazilian, and I almost never follow recipes all the way, I did not put the dough to chill and the cookies turned out just fine. If you want you can try putting them in the freezer, but if you don’t, they can still turn out great. So, do not worry about it if you are in a hurry like I was.


Bake the cookies for 6-9 mins and let it cool before decorating.  Make sure you watch your cookies, they can go from perfectly done to burnt in a matter of second it seems.  That’s what happened to us with the first few.


And that’s it!!! I hope you guys try it out and let me know how it went.

May we always remember the real meaning of Christmas which is Jesus Christ.


Have a Merry Christmas!


xoxo


Holiday Gift Idea: JORD Wood Watches

Olive & Acacia Wood Watch

This post contains advertising content, but opinions are my very own.

Hi there, how are you doing today?

I can’t believe it is December already and Christmas is just around the corner. With this crazy and busy life of mine, I decided to start shopping for the holidays a little earlier this year. I gifted my husband with what is in my opinion, one of the most elegant and sophisticated watches I have ever seen, plus it is a wood watch. Yes! You heard it right. It is a wood watch. So, I invited my husband to do a quick review of it and I am so excited to share with you his thoughts about JORD Watch.

***

IMG_9325

Hey!  This is Greg, Bianca’s husband and I am the owner of the watch in question.  I’m here to share with you my thoughts on the watch.  My most recent watch purchase was a smartwatch, so this watch is a complete contrast.

The watch is by JORD, it’s part of their Dover series & I opted for the Olive & Acacia Wood variant.  It also comes in 4 other wood combinations which you can find on their website.  For me, I chose the Olive & Acacia variation because of the wood’s significance in history.  It also turns out the combination works well with my skin tone & wardrobe color preferences, so it ended up being a great choice.

Going from my first smartwatch to my first wooden & automatic watch, I have a really enjoyed a new-found appreciation for a more natural, cord-free timepiece.  This watch is made to last, with the sapphire glass protecting the face & the automatic timepiece, no batteries needed.  Again, a stark difference from my smartwatch.

IMG_9333

IMG_9352

This watch stands out!  Using this watch while out-&-about and at work people have taken notice.  The inviting wooden band & casing catches people’s attention, then they are even more impressed with the open face showing the inner workings of the timepiece.  They usually ask if it is comfortable or if it feels cheap.  On my wrist, it is very comfortable, & it feels great.  The weight is perfect, & the wood links are smooth & secure, no pinching & no hair pulling.  The numbers are large and easily visible.

Without a doubt this watch is great!  I love it & I fully recommend this watch for yourself or as a gift.  JORD has quite a few other options in their online shop.  They also offer sizing and engravings, both on the watch & on its wooden box.  Take advantage of the exclusive savings as well! (Below)

IMG_9344

IMG_9316

***

Since it is the holiday season, JORD is giving my followers a 25% off discount! Their watches would be a great gift for men and woman. The codes are limited, and it ends December 15th, 2017 so hurry up & make sure you put in your information, so they can deliver your discount code!

I hope you can find some inspiration for the perfect gift for your loved ones and enjoy the 25% off code. Have a very Merry Christmas!!

– Bianca

xoxo

25 % off JORD WATCHES CODE

Dover Series, My Husband’s Watch

Women’s Watch Selection

Men’s Watch Selection


Luxury Wooden Watch
//www.woodwatches.com/widget-article/mommahuish